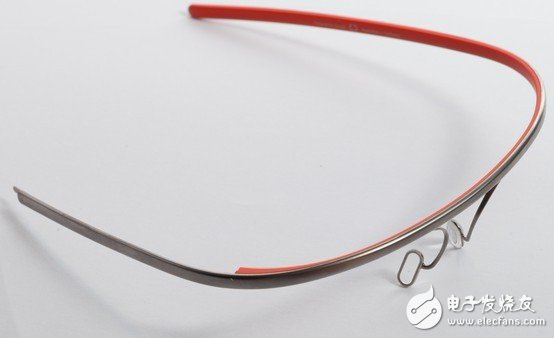
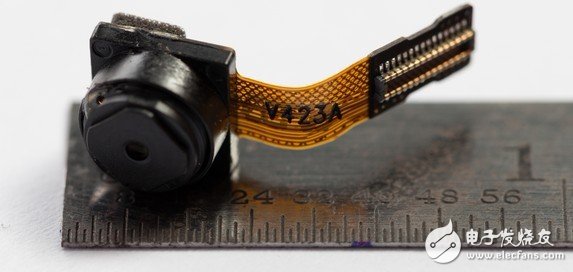
The main structure of Google Project Glass includes a camera suspended in front of the glasses and a wide strip computer processor on the right side of the frame. It is equipped with a camera with 5 million pixels and can shoot 720p video. The lens is equipped with a head-mounted miniature display that projects data onto a small screen above the user's right eye. The display looks like a 25-inch HD screen 2.4 meters away.
At the same time, Catwig dismantled Google Glass and found some interesting places. For example, if the main body is matched with ordinary glasses, it is found that some sensor functions are not very good, but there is no big obstacle to integrating the main body of Google glasses with the glasses we often wear. The battery module has a capacity of 570 mAh. The surface of the display is less than a penny, but the resolution is 640X360. The average pixel per inch is equivalent to one-eighth of the iPhone 5 Retina display.
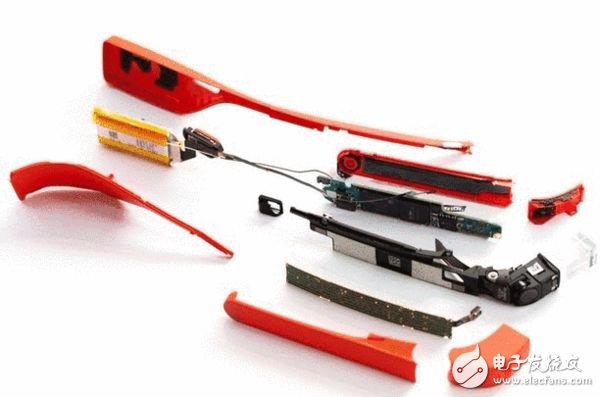
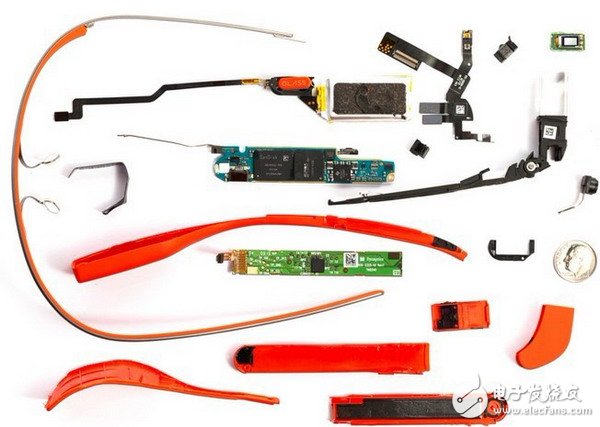
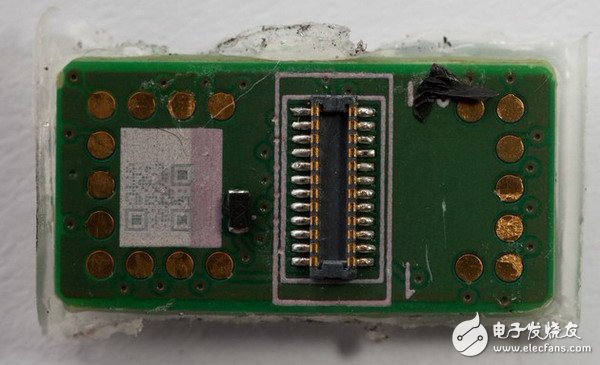
â–² The components are quite simple
Take a look at the report below:Before disassembling Google Glass, we have some questions: the glasses are entirely encapsulated in epoxy resin, and the device itself requires strong connectivity. How is it packaged? Where is the battery? Can hackers get into the glasses? Where is the sensor? Will there be other hardware features activated in future software upgrades? But the first question is: how to open it?
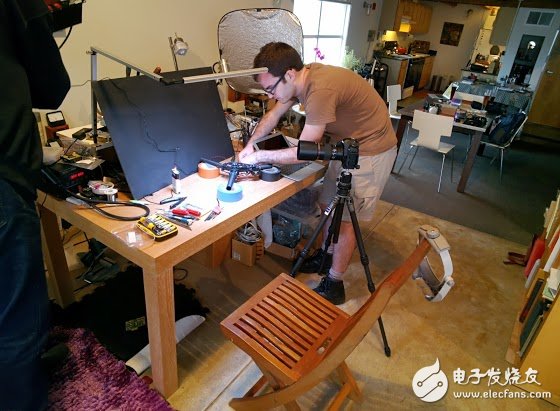
Demolition is mostly professional and requires a certain degree of precision and dexterity. In other words, if you are very careful and familiar with the disassembly, Google Glass will not damage the components when disassembling. After verification, the glasses are still running perfectly after disassembly and assembly, but the appearance is slightly damaged.
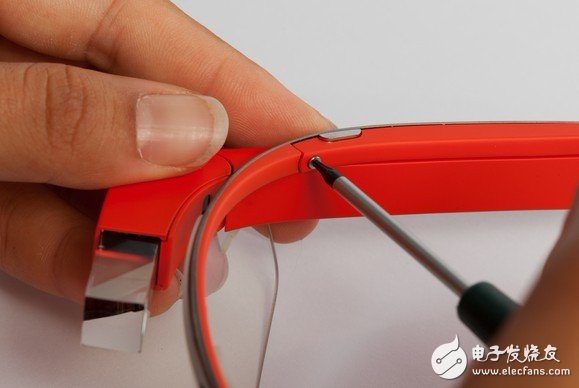
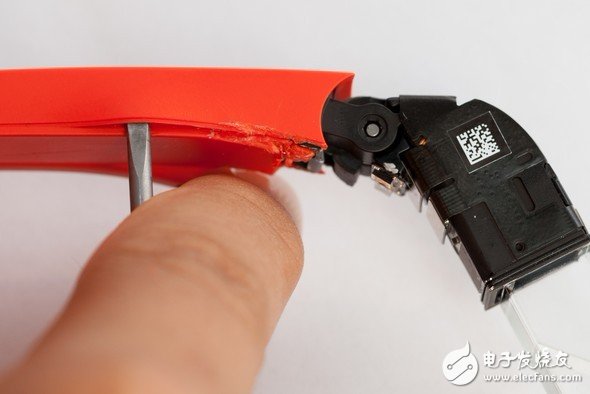
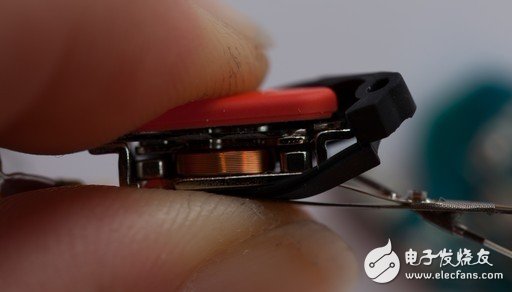
The first step: remove the shellStart with the Torx T5 screw and remove the plastic frame from the titanium frame. After removing the screw, you can also check the serial number of the glasses. It is hidden behind the titanium frame with black bars on it and the numbers are printed on it.

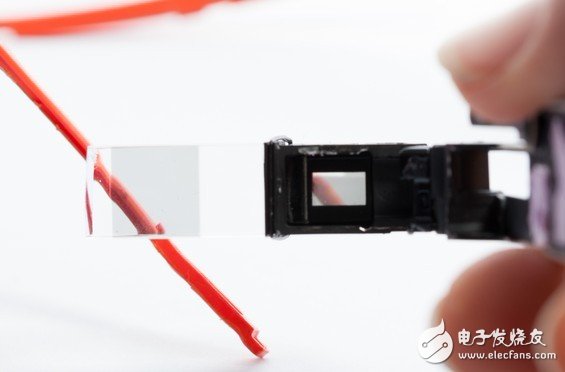
So far, Google Glass is not compatible with common glasses, but Google plans to let it support it. We connected the resin part of the eyeglass to the "simple" eyeglasses. Although the function is effective, the experience is quite bad, mainly because the head proximity sensor is unstable when it is close to the lens.
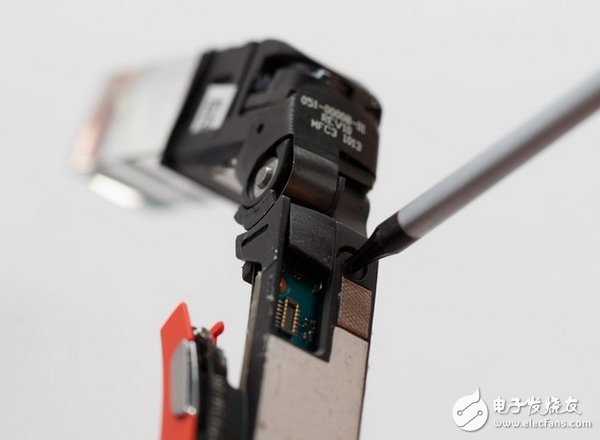
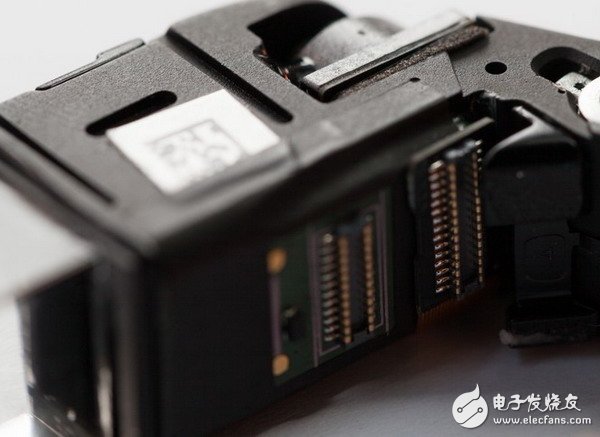
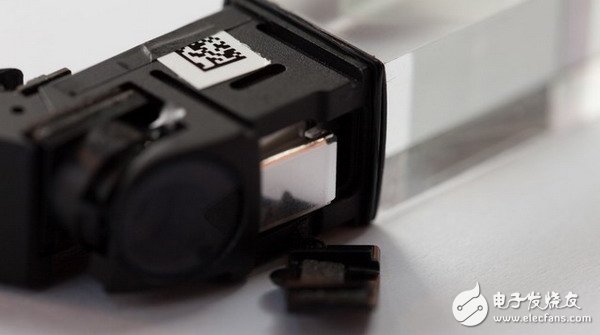
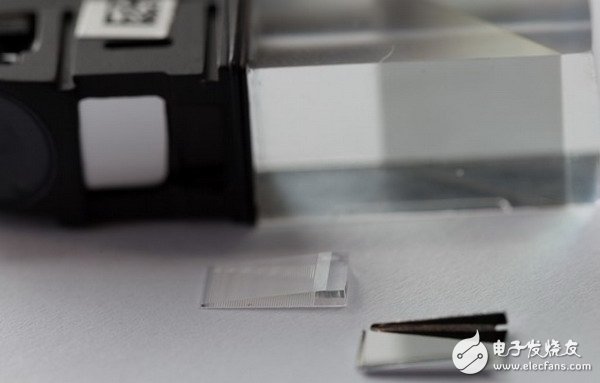
Next open the plastic case near the display, which is close to the main prism.
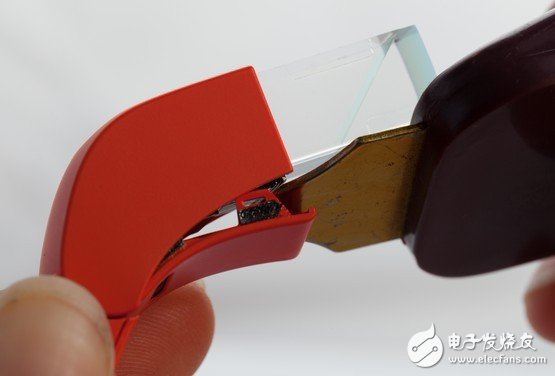

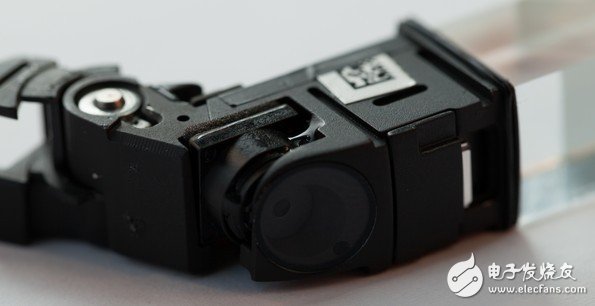
After disassembly, you can see the proximity sensor, which looks like an ambient light sensor.
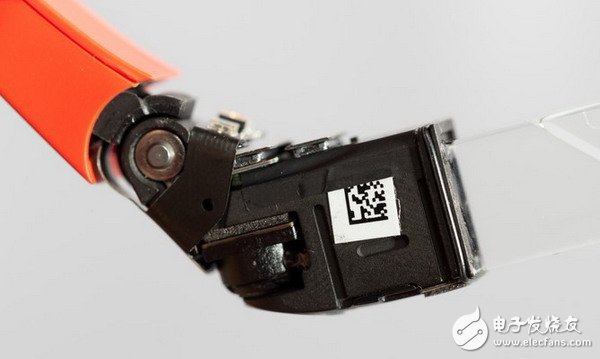
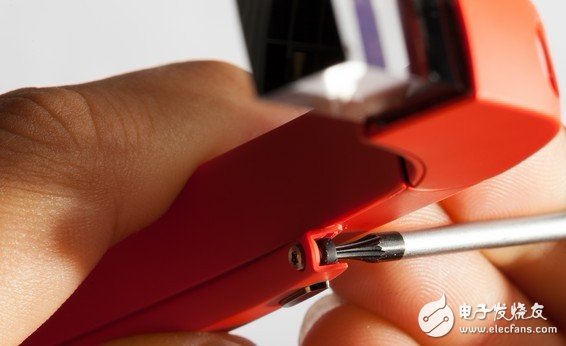
At this point, there are no plastic parts to disassemble. Finally found an internal screw, if you do not destroy the glasses can not be removed. We had to use some "violence", cut off some of the screws, uncover the outer casing, and then remove the screws.
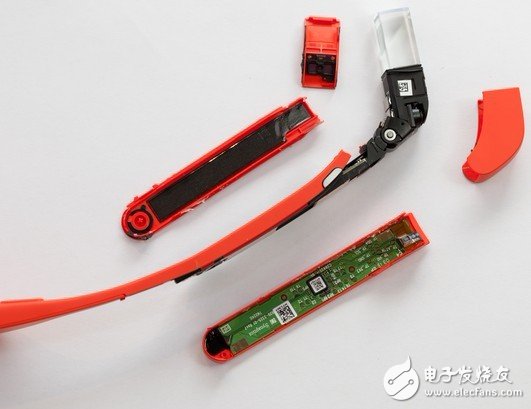
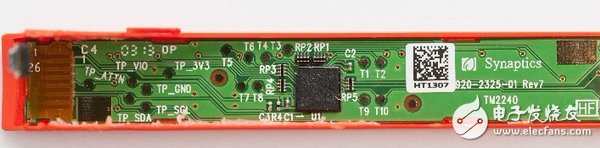
After disassembling the case, you will see some parts, including a separate touch module, which is located on the right side. The touch module is fully customizable and manufactured by Synaptics and controlled by a Synaptics T1320A touch controller.
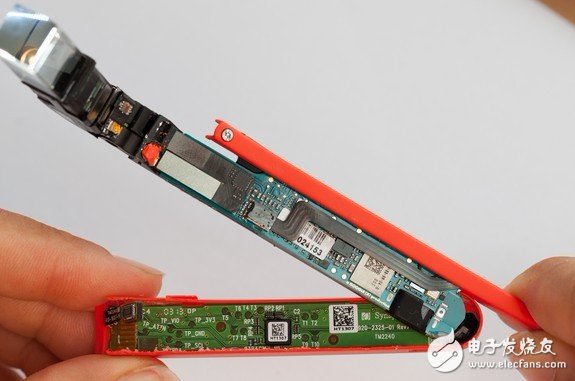

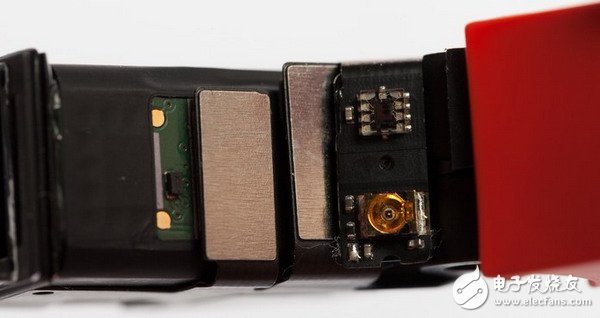
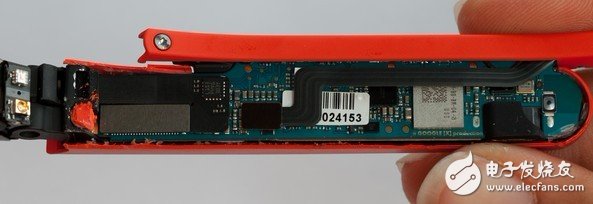
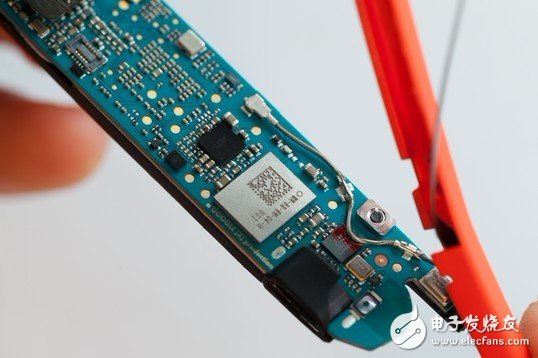
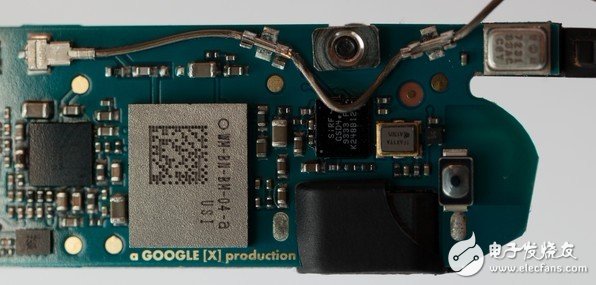
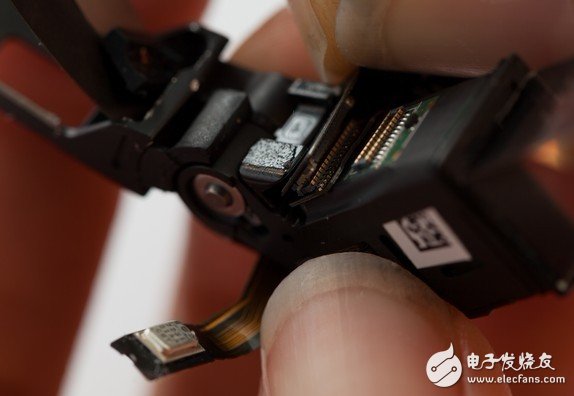
Now you can see the main board, the inside is the RF module, some small connectors, some supporting ICs, and a piece of copper that says "a GOOGLE [X] production".
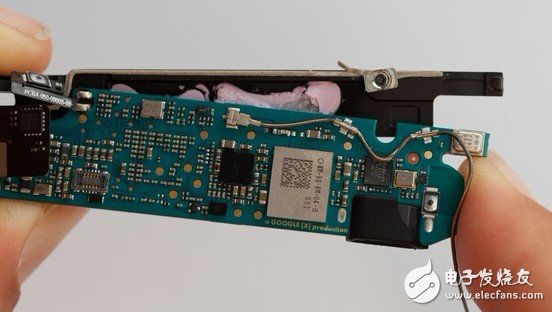
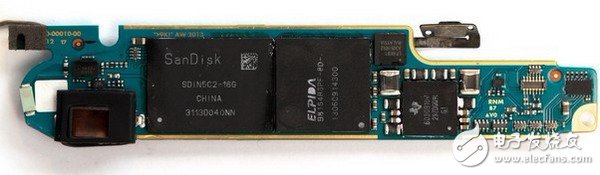
The main CPU board is connected to the thermal pad, and there are many adhesives on it. After clearing the pink adhesive, you can see the core chip, including: German instrument OMAP4430 chip, 16GB SanDisk memory chip, Elpida DRAM chip.

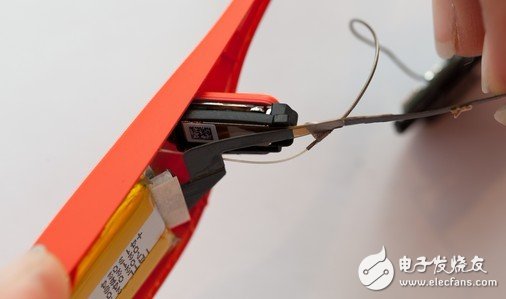
In order to make the glasses more balanced in weight, the battery was placed at the back of the wearer's ear, and some violence was used during the disassembly.

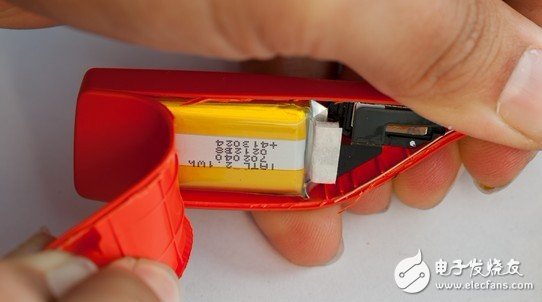
The single-cell lithium battery is placed at the end of the board and has a capacity of 2.1 watt hours (Watt Hours), equivalent to 570 mAh. The battery cannot be replaced.
The battery is slightly forward from the battery.

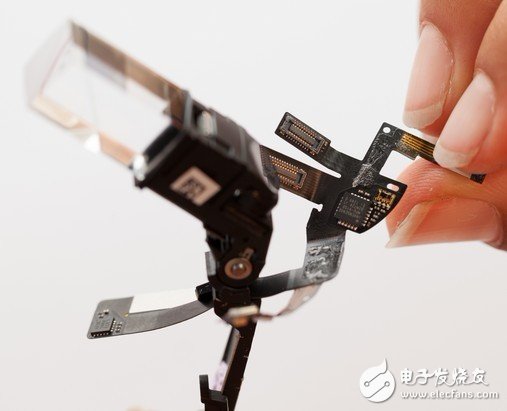
It's a circuit board. It's more complicated. It connects the motherboard to the display, camera, and other sensors. It either surrounds the frame or connects components through the frame.
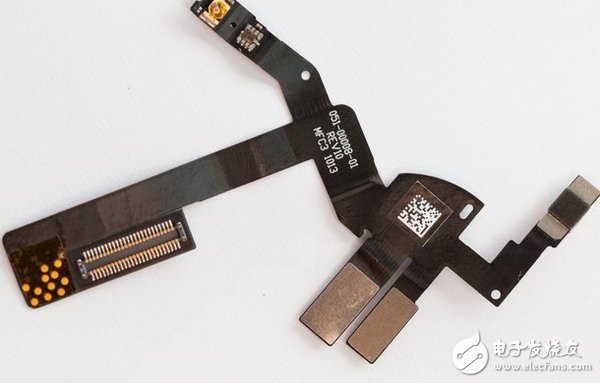
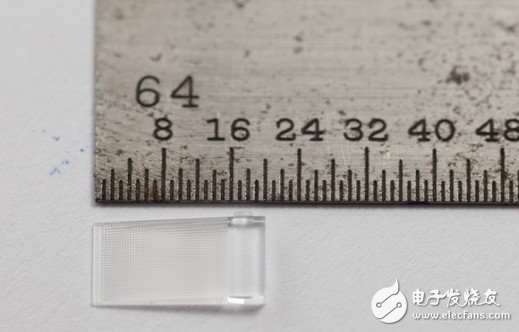
The display is small, it is attached to the internal frame, and the display frame has glue. After disassembly, place the display with a small circuit board on a penny coin, the length and diameter. The display resolution is 640X360, which is equivalent to one-eighth of the number of pixels per inch of the iPhone 5 display.

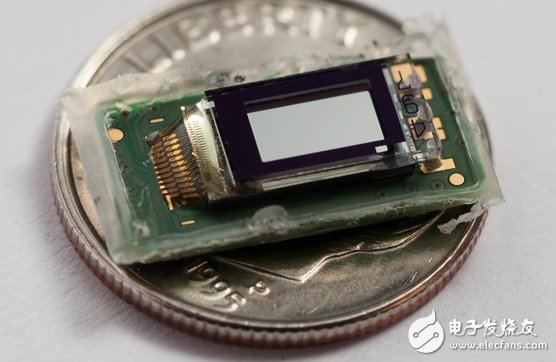
The glasses use a folded light-structured light tunnel that consists of a small number of small optical elements. The end result is that the image of the display looks like it floats a few feet in front of the face, in the upper right corner of the line of sight.
The camera looks like the size and specifications of a smartphone. From the design point of view, the camera and display should be independent of the CPU, and there is no direct connection between the two.
Since January 2015, Google has suspended the production of glasses and terminated the developer project at the same time. The reasons for the failure are as follows:
1. Power consumption is high and fever is serious. After more than one hour of power-on, the power consumption is over 80%. After wearing it for a period of time, it can feel severely hot. This is a problem that the industry has to solve, and it is also a short board.
2, no amazing features. Most of the feature phones can do it. The subject thinks about shooting this application scene when riding. I think why the mobile phone can satisfy the glasses.
3. The ecological chain of smart glasses has not yet been built. It is based on Google Glass for secondary development, but there are fewer people currently using it. How much more is it to develop?
| About Bare Copper Wire |
Good conductivity; Strong anticorrosion; Long service life; Lowest price; Easy installation
Bare Copper Wire is used as flexible connector in electric transmission and distribution appliance(such as volt transformer, electric
stove),electronic equipment and thyristor. Underground Electrical Wire also could be used for grounding wire in electric working.
Also, it can be manufactured accordingto customer's drawings and demands.

| 1. | Professional Operation Experience |
| 2. | The Sizes All Can Be Customised |
| 3. | Sample For Your Reference Available |
| 4. | Low MOQ, Low Price |
| 5. | Safe Packing & Prompt Delivery |
| 6. | Quality Guaranted: ISO9001:2008, All Kinds of Test |
Bare Copper Wire,Bare Copper Wire Solid,Copper Wire Bare Copper Wire,Pure Copper Wire Bare Copper
HENAN HUAYANG ELECTRICAL TECHNOLOGY GROUP CO.,LTD , https://www.huaonwire.com